今回は、Oracle OpenStack R1 でネットワーク構成をしてみます。
Oracle OpenStack R1 の Neutron では、Open vSwitch のプラグインを使用しています。
今回は、Control Node で作業しています。
コマンドで、下記のような環境を作ってみます。
コマンドで、下記のような環境を作ってみます。
外部接続用ブリッジへの NIC 接続。
まず、OpenStack 環境を外部ネットワークとつなぐつもりの
Open vSwitch ブリッジ「br-ex」に eth3 ポートを接続しておきます。
[root@osctl01 ~]# ovs-vsctl add-port br-ex eth3
[root@osctl01 ~]# ovs-vsctl show
1a22e1fd-4813-415f-8171-f4d18f01e175
Bridge br-ex
Port "eth3"
Interface "eth3"
Port br-ex
Interface br-ex
type: internal
Bridge br-int
fail_mode: secure
Port br-int
Interface br-int
type: internal
Port "int-br-eth2"
Interface "int-br-eth2"
Bridge "br-eth2"
Port "eth2"
Interface "eth2"
Port "phy-br-eth2"
Interface "phy-br-eth2"
Port "br-eth2"
Interface "br-eth2"
type: internal
ovs_version: "1.11.0"
ネットワーク環境構築。
デフォルトで作成される、admin テナントにネットワークを作成していきます。
まだ、ネットワークは何も用意されていない状態です。
今回はコマンドで設定していますが、
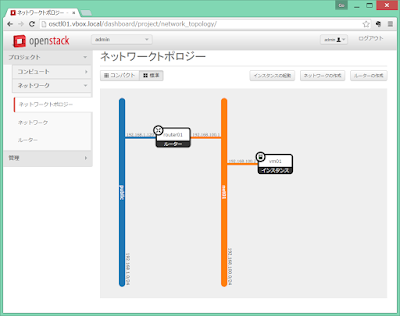
わかりやすいので、Horizon ダッシュボードの様子も見てみます。

admin テナントの ID を確認しておきます。
[root@osctl01 ~]# source keystonerc_admin
[root@osctl01 ~(keystone_admin)]# keystone tenant-list
+----------------------------------+----------+---------+
| id | name | enabled |
+----------------------------------+----------+---------+
| c79c5e2a0174431d88958ebc9d1cb17d | admin | True |
| 3fb2c4e44c9b423c83ddded0776129a1 | services | True |
+----------------------------------+----------+---------+
これから何度か指定するため、admin テナントの ID を変数に入れておきます。
[root@osctl01 ~(keystone_admin)]# tenant_id=c79c5e2a0174431d88958ebc9d1cb17d
外部接続するためのネットワークを「public」という名前で作成します。
[root@osctl01 ~(keystone_admin)]# neutron net-create public --router:external=True --provider:network_type=flat
Created a new network:
+---------------------------+--------------------------------------+
| Field | Value |
+---------------------------+--------------------------------------+
| admin_state_up | True |
| id | baf9f2cf-c4c9-42d7-8fb3-2a940f83b2e0 |
| name | public |
| provider:network_type | flat |
| provider:physical_network | default |
| provider:segmentation_id | |
| router:external | True |
| shared | False |
| status | ACTIVE |
| subnets | |
| tenant_id | c79c5e2a0174431d88958ebc9d1cb17d |
+---------------------------+--------------------------------------+
public ネットワークに、サブネットを作成します。
[root@osctl01 ~(keystone_admin)]# neutron subnet-create public 192.168.1.0/24 --name public_subnet --enable_dhcp=False --allocation-pool start=192.168.1.120,end=192.168.1.149 --gateway=192.168.1.253
Created a new subnet:
+------------------+----------------------------------------------------+
| Field | Value |
+------------------+----------------------------------------------------+
| allocation_pools | {"start": "192.168.1.120", "end": "192.168.1.149"} |
| cidr | 192.168.1.0/24 |
| dns_nameservers | |
| enable_dhcp | False |
| gateway_ip | 192.168.1.253 |
| host_routes | |
| id | 3d0639e2-5669-4158-a31d-e0c70d0a7edb |
| ip_version | 4 |
| name | public_subnet |
| network_id | baf9f2cf-c4c9-42d7-8fb3-2a940f83b2e0 |
| tenant_id | c79c5e2a0174431d88958ebc9d1cb17d |
+------------------+----------------------------------------------------+
こうなります。

ルータを作成します。
[root@osctl01 ~(keystone_admin)]# neutron router-create --tenant-id $tenant_id router01
Created a new router:
+-----------------------+--------------------------------------+
| Field | Value |
+-----------------------+--------------------------------------+
| admin_state_up | True |
| external_gateway_info | |
| id | cb9338a4-45ec-4fbe-991e-f18084da689f |
| name | router01 |
| status | ACTIVE |
| tenant_id | c79c5e2a0174431d88958ebc9d1cb17d |
+-----------------------+--------------------------------------+
ルータができました。

ルータのゲートウェイを設定します。
[root@osctl01 ~(keystone_admin)]# neutron router-gateway-set router01 public
Set gateway for router router01
ルータが public ネットワークにつながりました。

OpenStack 内部で使用するネットワークを、net01 という名前で作成します。
[root@osctl01 ~(keystone_admin)]# neutron net-create --tenant-id=$tenant_id net01
Created a new network:
+---------------------------+--------------------------------------+
| Field | Value |
+---------------------------+--------------------------------------+
| admin_state_up | True |
| id | 06ab575b-b965-4d58-9b0b-19e5040af590 |
| name | net01 |
| provider:network_type | vlan |
| provider:physical_network | default |
| provider:segmentation_id | 100 |
| shared | False |
| status | ACTIVE |
| subnets | |
| tenant_id | c79c5e2a0174431d88958ebc9d1cb17d |
+---------------------------+--------------------------------------+
あわせて、サブネットを作成します。
[root@osctl01 ~(keystone_admin)]# neutron subnet-create --tenant-id=$tenant_id net01 192.168.100.0/24 --name subnet-net01
Created a new subnet:
+------------------+------------------------------------------------------+
| Field | Value |
+------------------+------------------------------------------------------+
| allocation_pools | {"start": "192.168.100.2", "end": "192.168.100.254"} |
| cidr | 192.168.100.0/24 |
| dns_nameservers | |
| enable_dhcp | True |
| gateway_ip | 192.168.100.1 |
| host_routes | |
| id | 3b446c54-0224-41e1-8022-f56612a3b03c |
| ip_version | 4 |
| name | subnet-net01 |
| network_id | 06ab575b-b965-4d58-9b0b-19e5040af590 |
| tenant_id | c79c5e2a0174431d88958ebc9d1cb17d |
+------------------+------------------------------------------------------+
net01 ネットワークが作成され、サブネットが設定されました。

サブネットをルータに接続します。
[root@osctl01 ~(keystone_admin)]# neutron router-interface-add router01 subnet-net01
Added interface 78fcd88d-c47d-41d3-ac22-567c6e544d12 to router router01.
これでネットワークはいったん完成とします。

ping と SSH でネットワークの接続確認をしたいので、
セキュリティグループへルール追加しておきます。
今回は default グループにルールを追加してしまいます。
[root@osctl01 ~(keystone_admin)]# nova secgroup-add-rule default icmp -1 -1 0.0.0.0/0
+-------------+-----------+---------+-----------+--------------+
| IP Protocol | From Port | To Port | IP Range | Source Group |
+-------------+-----------+---------+-----------+--------------+
| icmp | -1 | -1 | 0.0.0.0/0 | |
+-------------+-----------+---------+-----------+--------------+
[root@osctl01 ~(keystone_admin)]# nova secgroup-add-rule default tcp 22 22 0.0.0.0/0
+-------------+-----------+---------+-----------+--------------+
| IP Protocol | From Port | To Port | IP Range | Source Group |
+-------------+-----------+---------+-----------+--------------+
| tcp | 22 | 22 | 0.0.0.0/0 | |
+-------------+-----------+---------+-----------+--------------+
ネットワークの接続確認。
以前に登録した CirrOS の Glance イメージを使用します。
[root@osctl01 ~(keystone_admin)]# glance image-list
+--------------------------------------+--------+-------------+------------------+----------+--------+
| ID | Name | Disk Format | Container Format | Size | Status |
+--------------------------------------+--------+-------------+------------------+----------+--------+
| 0b26fc17-3aa9-4b39-84db-e26ec68a435b | cirros | qcow2 | bare | 13287936 | active |
+--------------------------------------+--------+-------------+------------------+----------+--------+
Nova インスタンスを起動します。
「--nic」には、先ほど作成した net01 ネットワークの UUID を指定しています。
[root@osctl01 ~(keystone_admin)]# nova boot --flavor 1 --image cirros --nic net-id=06ab575b-b965-4d58-9b0b-19e5040af590 vm01
+--------------------------------------+-----------------------------------------------+
| Property | Value |
+--------------------------------------+-----------------------------------------------+
| OS-DCF:diskConfig | MANUAL |
| OS-EXT-AZ:availability_zone | nova |
| OS-EXT-SRV-ATTR:host | - |
| OS-EXT-SRV-ATTR:hypervisor_hostname | - |
| OS-EXT-SRV-ATTR:instance_name | instance-00000007 |
| OS-EXT-STS:power_state | 0 |
| OS-EXT-STS:task_state | scheduling |
| OS-EXT-STS:vm_state | building |
| OS-SRV-USG:launched_at | - |
| OS-SRV-USG:terminated_at | - |
| accessIPv4 | |
| accessIPv6 | |
| adminPass | E6hdx9MjSWov |
| config_drive | |
| created | 2015-11-03T12:33:43Z |
| flavor | m1.tiny (1) |
| hostId | |
| id | 7668c1d3-1f50-4041-8085-f5b1b3ee2909 |
| image | cirros (0b26fc17-3aa9-4b39-84db-e26ec68a435b) |
| key_name | - |
| metadata | {} |
| name | vm01 |
| os-extended-volumes:volumes_attached | [] |
| progress | 0 |
| security_groups | default |
| status | BUILD |
| tenant_id | c79c5e2a0174431d88958ebc9d1cb17d |
| updated | 2015-11-03T12:33:43Z |
| user_id | 695d91537c7a4e6fb672e856a6fa5900 |
+--------------------------------------+-----------------------------------------------+
インスタンス「vm01」が起動された状態です。
net01 ネットワークにも接続され、DHCP で IP アドレス(192.168.100.2) が付与されました。

フローティング IP アドレスを払い出しておきます。
今回は、192.168.1.121 が払い出されています。
[root@osctl01 ~(keystone_admin)]# neutron floatingip-create public
Created a new floatingip:
+---------------------+--------------------------------------+
| Field | Value |
+---------------------+--------------------------------------+
| fixed_ip_address | |
| floating_ip_address | 192.168.1.121 |
| floating_network_id | baf9f2cf-c4c9-42d7-8fb3-2a940f83b2e0 |
| id | 5db82a29-e1d7-4968-8bee-2eb9f703c69a |
| port_id | |
| router_id | |
| status | ACTIVE |
| tenant_id | c79c5e2a0174431d88958ebc9d1cb17d |
+---------------------+--------------------------------------+
インスタンスに、フローティング IP アドレスを割り当てます。
[root@osctl01 ~(keystone_admin)]# nova floating-ip-associate vm01 192.168.1.121
しばらく待つと、vm01 が Running になります。
そして、フローティング IP アドレスがアサインされていることもわかります。
[root@osctl01 ~(keystone_admin)]# nova list
+--------------------------------------+------+--------+------------+-------------+------------------------------------+
| ID | Name | Status | Task State | Power State | Networks |
+--------------------------------------+------+--------+------------+-------------+------------------------------------+
| 7668c1d3-1f50-4041-8085-f5b1b3ee2909 | vm01 | ACTIVE | - | Running | net01=192.168.100.2, 192.168.1.121 |
+--------------------------------------+------+--------+------------+-------------+------------------------------------+
OpenStack 環境外(今回は VirtualBox のホスト)からの ping も通ります。
これは、Control Node の eth3 を経由しているはずです。
PS C:\Users\gowatana> ping 192.168.1.121
192.168.1.121 に ping を送信しています 32 バイトのデータ:
192.168.1.121 からの応答: バイト数 =32 時間 =5ms TTL=63
192.168.1.121 からの応答: バイト数 =32 時間 =2ms TTL=63
192.168.1.121 からの応答: バイト数 =32 時間 =1ms TTL=63
192.168.1.121 からの応答: バイト数 =32 時間 =3ms TTL=63
192.168.1.121 の ping 統計:
パケット数: 送信 = 4、受信 = 4、損失 = 0 (0% の損失)、
ラウンド トリップの概算時間 (ミリ秒):
最小 = 1ms、最大 = 5ms、平均 = 2ms
最初に eth3 を br-ex ブリッジに接続しましたが、
この時点では、br-ex には qg-5a21ae2e-33 というインターフェースも接続されます。
[root@osctl01 ~(keystone_admin)]# ovs-vsctl show
1a22e1fd-4813-415f-8171-f4d18f01e175
Bridge "br-eth2"
Port "br-eth2"
Interface "br-eth2"
type: internal
Port "eth2"
Interface "eth2"
Port "phy-br-eth2"
Interface "phy-br-eth2"
Bridge br-ex Port "eth3"
Interface "eth3"
Port br-ex
Interface br-ex
type: internal
Port "qg-5a21ae2e-33"
Interface "qg-5a21ae2e-33"
type: internal
Bridge br-int
fail_mode: secure
Port "tap6dc0b492-bb"
tag: 2
Interface "tap6dc0b492-bb"
type: internal
Port br-int
Interface br-int
type: internal
Port "int-br-eth2"
Interface "int-br-eth2"
Port "qr-2865cb25-d1"
tag: 2
Interface "qr-2865cb25-d1"
type: internal
ovs_version: "1.11.0"
新たに作成された「qrouter-~」というネットワークネームスペースで
qg-5a21ae2e-33 の IP アドレスを見てみると、
フローティング IP アドレスが割り当てられているのがわかります。
[root@osctl01 ~(keystone_admin)]# ip netnsqrouter-cb9338a4-45ec-4fbe-991e-f18084da689f
qdhcp-06ab575b-b965-4d58-9b0b-19e5040af590
[root@osctl01 ~(keystone_admin)]# ip netns exec qrouter-cb9338a4-45ec-4fbe-991e-f18084da689f ip addr show qg-5a21ae2e-33 18: qg-5a21ae2e-33: <BROADCAST,UP,LOWER_UP> mtu 1500 qdisc noqueue state UNKNOWN
link/ether fa:16:3e:40:9b:da brd ff:ff:ff:ff:ff:ff
inet 192.168.1.120/24 brd 192.168.1.255 scope global qg-5a21ae2e-33
inet 192.168.1.121/32 brd 192.168.1.121 scope global qg-5a21ae2e-33
inet6 fe80::f816:3eff:fe40:9bda/64 scope link
valid_lft forever preferred_lft forever
フローティング IP (192.168.1.121)を指定して vm01 に SSH でログインしてみると、
ログインした CirrOS のインスタンスには フローティング IP ではない
実アドレス(今回は 192.168.100.2)が設定されていることがわかります。

以上、普通の OpenStack 操作ですが、
Oracle OpenStack でのネットワーク環境を構成してみる話でした。
Oracle OpenStack でのネットワーク環境を構成してみる話でした。
0 件のコメント:
コメントを投稿