インストール先のOSは、Oracle Linux 5.9 64bit です。
インストール環境の概要
- CPU: AMD Athlon(tm) II Neo N36L Dual-Core Processor
- メモリ: 2GB(インストール要件は6GB。時間はかかるがインストールできた)
- ディスク: OS領域に 16GB(/, /boot, swap)、/u01に10GB
- 実はVMにインストールしています。(しかもESXi 5.0 ・・・)
参考:
Oracle VM Installation and Upgrade Guide for Release 3.2.1
4.3.1. Hardware Requirements
http://docs.oracle.com/cd/E35328_01/E35330/html/vmiug-manager-requirements.html#vmiug-manager-hardware
1. OSインストール
Oracle Linux 5.9 をインストールします。(詳細は省略)
パッケージは、下記を追加選択しました。
- 開発
- レガシーなソフトウェア開発
- 開発ツール
- 開発ライブラリ
- ベースシステム
- システムツール
- oracle-validated
ファイアウォールは「無効」にします。
SELinux設定 も「無効」にします。
2. hostsファイルの編集
/etc/hostsファイルにOVMM自身のホスト名を記入しておきます。
[root@ovmm31 ~]# cat /etc/hosts
# Do not remove the following line, or various programs
# that require network functionality will fail.
127.0.0.1 localhost.localdomain localhost
::1 localhost6.localdomain6 localhost6
192.168.0.231 ovmm31.gowatana.lab ovmm31
3. 前提RPMパッケージの確認
インストール前提となるPRMパッケージを確認しておきます。
- libaio
- unzip
- bc
[root@ovmm31 ~]# rpm --qf "%{NAME}-%{VERSION}-%{RELEASE} %{ARCH}\n" -q libaio
libaio-0.3.106-5 x86_64
libaio-0.3.106-5 i386
[root@ovmm31 ~]# rpm --qf "%{NAME}-%{VERSION}-%{RELEASE} %{ARCH}\n" -q unzip
unzip-5.52-3.0.1.el5 x86_64
[root@ovmm31 ~]# rpm --qf "%{NAME}-%{VERSION}-%{RELEASE} %{ARCH}\n" -q bc
bc-1.06-21 x86_64
4. ソフトウェアインストール先の確認
OVMMのインストール要件として、/u01に 5.5GB 必要なので、
余裕をもって約10GB割り当てました。
[root@ovmm31 mnt]# df -h /u01
Filesystem サイズ 使用 残り 使用% マウント位置
/dev/sdb1 9.9G 151M 9.2G 2% /u01
5. インストールメディアのマウント
OVMMのインストールメディアをマウントします。
※インストールメディアは、e-Delivery (https://edelivery.oracle.com/linux)からDLできます。
[root@ovmm31 ~]# mount /dev/cdrom /mnt
mount: ブロックデバイス /dev/cdrom は書き込み禁止です、読込み専用でマウントします
[root@ovmm31 ~]# ls /mnt
EULA TRANS.TBL oracle-validated.params runUpgrader.sh
LICENSE components ovmm-installer.bsx upgrade
OvmSDK_3.2.1.516.zip createOracle.sh runInstaller.sh
6. 環境構成スクリプト
インストールメディアに含まれる環境構成スクリプトを実行します。
(★読み取り専用の領域で実行してしまったのでエラーが出ています)
[root@ovmm31 ~]# cd /mnt
[root@ovmm31 mnt]# ./createOracle.sh
mkdir: ディレクトリ `2月-18-2013-08-01-00' を作成できません: 読み込み専用ファイルシステムです ★エラーが・・・
Adding group 'oinstall' with gid '54323' ...
groupadd: group oinstall exists
Adding group 'dba'
groupadd: group dba exists
Adding user 'oracle' with user id '54322', initial login group 'dba', supplementary group 'oinstall' and home directory '/home/oracle' ...
User 'oracle' already exists ...
uid=54321(oracle) gid=54321(oinstall) 所属グループ=54321(oinstall),54322(dba)
Creating user 'oracle' succeeded ...
/bin/cp: target `2月-18-2013-08-01-00' is not a directory
Failed to copy /etc/security/limits.conf to /var/log/oracle-validated/backup/ 2月-18-2013-08-01-00 ... ★エラーが・・・(後の手順で別途設定する)
Verifying user limits failed ...
Changing '/u01' permission to 755 ...
Modifying iptables for OVM
Adding rules to enable access to:
7002 : Oracle VM Manager https
15901 : Oracle VM Manager VM console proxy
54321 : Oracle VM Manager core
54322 : Oracle VM Manager core via SSL
123 : NTP
10000 : Oracle VM Manager CLI Tool
ファイアウォールのルールを /etc/sysconfig/iptables に保存中[ OK ]
Rules added.
7. シェル制限の変更
環境構成スクリプトで設定できなかったシェル制限設定を、手動で実施します。
設定ファイル(/etc/security/limits.conf)に追記します。
[root@ovmm31 ~]# vi /etc/security/limits.conf
★下記を追記
oracle hard nofile 8192
oracle soft nofile 8192
oracle soft nproc 4096
oracle hard nproc 4096
oracle soft core unlimited
oracle hard core unlimited
8. インストールスクリプトを実行
インストールスクリプトを実行します。
インストールタイプで 「Simple」 を選択すると、従来のOracle Database XE のかわりに
MySQL 5.5 がインストールされます。
※これ以降のOVMMリリースには、OracleXE は同梱されないようです。
[root@ovmm31 mnt]# ./runInstaller.sh
Oracle VM Manager Release 3.2.1 Installer
Oracle VM Manager Installer log file:
/tmp/ovm-manager-3-install-2013-02-18-001745.log
Please select an installation type:
1: Simple (includes database if necessary)
2: Custom (using existing Oracle database)
3: Uninstall
4: Help
Select Number (1-4): 1 ★Simple(以前の「Demo」と同様)を選択。
Starting production with local database installation ...
Verifying installation prerequisites ...
*** WARNING: Recommended memory for the Oracle VM Manager server installation using Local MySql DB is 7680 MB RAM ★メモリ不足の警告が出るがインストールは可能
One password is used for all users created and used during the installation.
Enter a password for all logins used during the installation: ★設定するパスワードを入力する。
Enter a password for all logins used during the installation (confirm):
Verifying configuration ...
Start installing the configured components:
1: Continue
2: Abort
Select Number (1-2): 1 ★インストールを開始するので「1」を入力。
Step 1 of 9 : Database Software...
Installing Database Software...
Retrieving MySQL Database 5.5 ...
Unzipping MySQL RPM File ...
Installing MySQL 5.5 RPM package ...
Configuring MySQL Database 5.5 ...
Installing MySQL backup RPM package ...
Step 2 of 9 : Java ...
Installing Java ...
Step 3 of 9 : Database schema ...
Creating database 'ovs' ...
Creating user 'ovs' for database 'ovs'...
Step 4 of 9 : WebLogic ...
Retrieving Oracle WebLogic Server 11g ...
Installing Oracle WebLogic Server 11g ...
Step 5 of 9 : ADF ...
Retrieving Oracle Application Development Framework (ADF) ...
Unzipping Oracle ADF ...
Installing Oracle ADF ...
Installing Oracle ADF Patch...
Step 6 of 9 : Oracle VM ...
Retrieving Oracle VM Manager Application ...
Extracting Oracle VM Manager Application ...
Installing Oracle VM Manager Core ...
Step 7 of 9 : Domain creation ...
Creating Oracle WebLogic Server domain ...
Starting Oracle WebLogic Server 11g ...
Configuring data source 'OVMDS' ...
Creating Oracle VM Manager user 'admin' ...
Step 8 of 9 : Deploy ...
Deploying Oracle VM Manager Core container ...
Deploying Oracle VM Manager UI Console ...
Deploying Oracle VM Manager Help ...
Granting ovm-admin role to user 'admin' ...
Set Log Rotation ...
Disabling HTTP and enabling HTTPS...
Configuring Https Identity and Trust...
Configuring Weblogic parameters...
Step 9 of 9 : Oracle VM Manager Shell ...
Retrieving Oracle VM Manager Shell & API ...
Extracting Oracle VM Manager Shell & API ...
Installing Oracle VM Manager Shell & API ...
Retrieving Oracle VM Manager Upgrade tool ...
Extracting Oracle VM Manager Upgrade tool ...
Installing Oracle VM Manager Upgrade tool ...
Retrieving Oracle VM Manager CLI tool ...
Extracting Oracle VM Manager CLI tool...
Installing Oracle VM Manager CLI tool ...
Copying Oracle VM Manager shell to '/usr/bin/ovm_shell.sh' ...
Installing ovm_admin.sh in '/u01/app/oracle/ovm-manager-3/bin' ...
Installing ovm_upgrade.sh in '/u01/app/oracle/ovm-manager-3/bin' ...
Enabling Oracle VM Manager service ...
Shutting down Oracle VM Manager instance ...
Restarting Oracle VM Manager instance ...
Waiting for the application to initialize ...
Oracle VM Manager is running ...
Oracle VM Manager installed.
Please wait while WebLogic configures the applications... This can take up to 5 minutes.
Installation Summary
--------------------
Database configuration:
Database type : MySQL
Database host name : localhost
Database name : ovs
Database listener port : 49500
Database user : ovs
Weblogic Server configuration:
Administration username : weblogic
Oracle VM Manager configuration:
Username : admin
Core management port : 54321
UUID : 0004fb000001000012738a647a8d2b17
Passwords:
There are no default passwords for any users. The passwords to use for Oracle VM Manager, Database, and Oracle WebLogic Server have been set by you during this installation. In the case of a default install, all passwords are the same.
Oracle VM Manager UI:
https://ovmm31:7002/ovm/console
Log in with the user 'admin', and the password you set during the installation.
Please note that you need to install tightvnc-java on this computer to access a virtual machine's console.
For more information about Oracle Virtualization, please visit:
http://www.oracle.com/virtualization/
Oracle VM Manager installation complete.
Please remove configuration file /tmp/ovm_configshkCBB.
[root@ovmm31 mnt]#
9. ログイン確認
WebブラウザでOVMMにアクセスします。
※OVMM 3.2.1では、デフォルトでhttpは無効になるのでhttpsでアクセスします。
- URL: https://<OVMMのIPアドレス>:7002/ovm/console/
- ユーザ: admin
- パスワード: インストール時に指定したパスワード
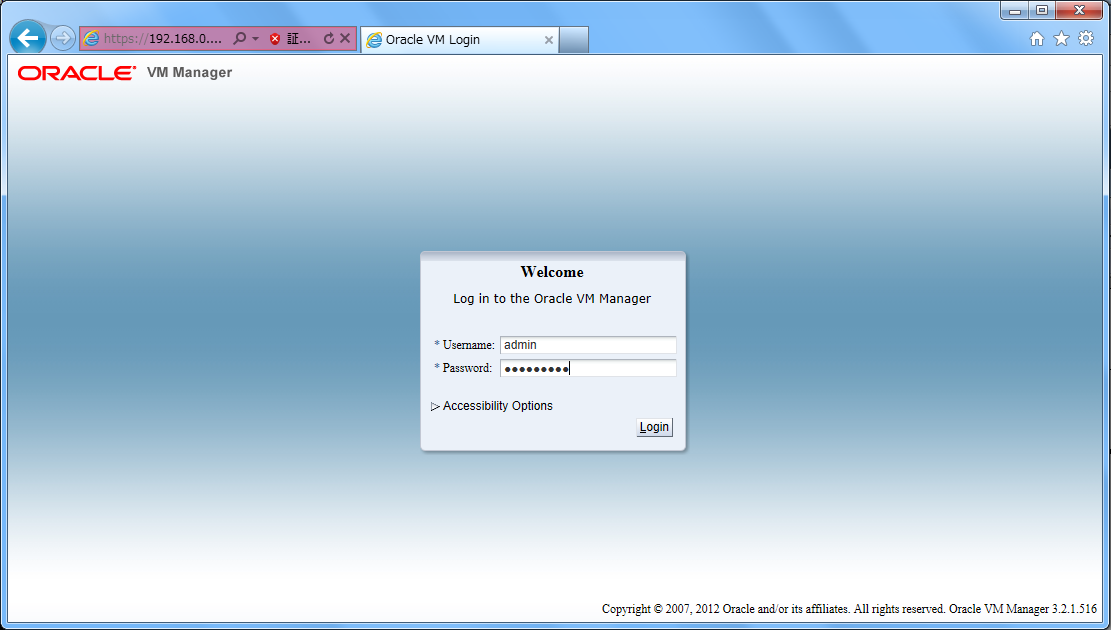
OVMM にログインできることを確認します。
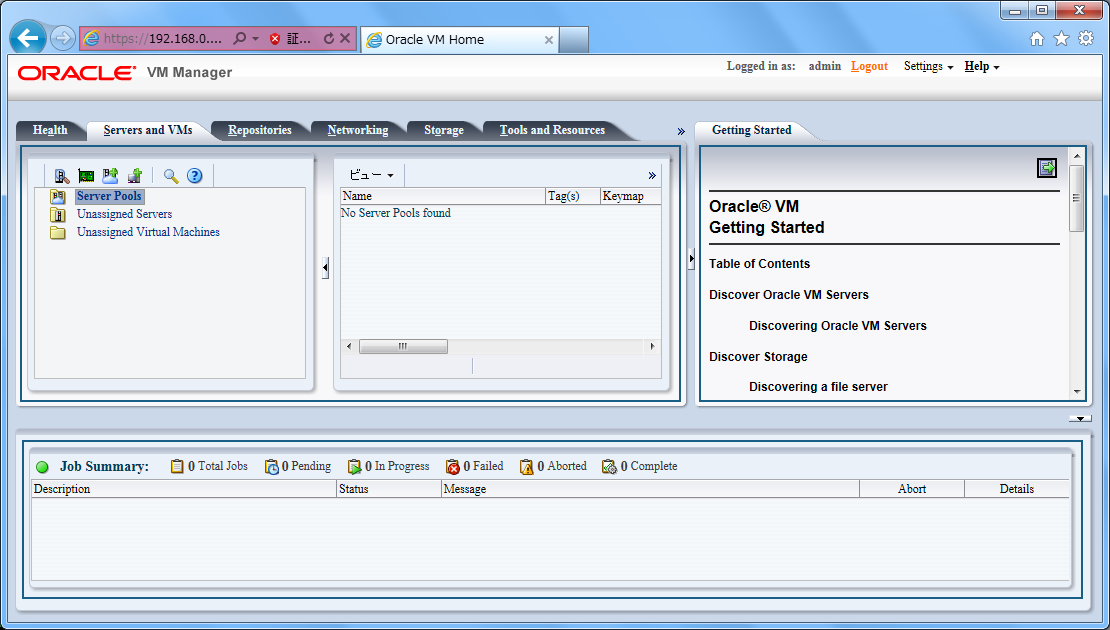
以上、OVMM 3.2.1のインストールでした。
0 件のコメント:
コメントを投稿